02 October 2010
Create a Project in HyperCities using Google My Maps
You will do this by first using Google’s user-friendly My Maps tool to build your map, and then embedding that completed mark-up (aka a –KML—) file into HyperCities. Then, whenever you update or modify your map using the Google My Maps interface, those changes will automatically appear in HyperCities as well.
Steps
-

Google My Maps First, create your Google My Map:
- Make sure you are logged into your Google account. (Create an account if you don't already have one).
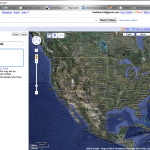
- Go to the Google Maps page & click on "My Maps" (top left).
- Click on "Create New Map." You are now ready to begin creating your map. For how to do this, please visit Google’s Getting Started with My Maps help page. Reading the information there and watching the video tutorial is recommended.
- You will see links to more advanced Google My Maps help topics also: Adding Map Features and Adding Other Content are two pages you will likely want to read as well.
- Expect to take some time familiarizing yourself with the process of creating points, lines, routes, information bubbles, embedding photos, video, and so on. (These are all quite straightforward, but it can take a little while to get comfortable/fluent in the editing environment).
- Once you are ready to import your map into HyperCities, RIGHT-click on the "View in Google Earth" link in the light blue bar above your map. From the drop-down menu that appears, select (left-click) "Copy Link Address". It is crucial that you go through this process of copying this 'link address' (and *not* copy the web page URL, for example).
- (Note: once you've imported your map into HyperCities, you can always go back and edit your map in Google My Maps, and the changes will automatically appear in HyperCities. You can also set your map to be private on both sites, so you don't need to worry this being a final public product until you're completely ready).
- Go to the HyperCities site and click "Launch Hypercities".
- Click "LOGIN" (top right corner). You can login using your Google account or another account of your choice. You will be asked to provide some basic information upon first registering.
- Once you're logged in to HyperCities, click on the plus sign (+) icon in the top-left corner of the map to begin adding the Google My Maps map mark-up (aka 'KML') file you created in the previous step.
- Click on the 'KML' icon from the column of icons that appears.
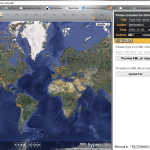
- Enter the Title, Author, Time/Date range, and copyright info (if any) for your map.
- Finally, paste the link you copied from your Google My Map into the KML URL field. You can preview the KML file (i.e., your map info) if you like. When you're ready, select the appropriate collection at the bottom of the page, and click "Submit" to save your map.
- That’s it! Again, you can always modify your map via the Google My Maps interface. Once you save your changes there, they will automatically appear in Hypercities.

Now, embed your map data file in Hypercities:

