28 August 2012
Vectorizing Historic Maps
You have finished georeferencing a historic map (see Georeferencing – making historical maps spatial) and have created a map image which you can now overlay on top of other GIS layers. But is there anything else that you can do with your georeferenced map image? Yes, you can create point, line or polygon features from items of interest on the georeferenced map. This process is called vectorizing and it enables you to display just those features on other maps and to analyze them with GIS software. These features could be archaeological sites, battlefields, old trails, historic boundaries, etc. It is important, however, to be aware that the accuracy of the vector data created depends both on the quality of the original map and the georeferencing. Historic maps that are very distorted by the georeferencing process are not a good source for the creation of vector features. In fact the map we’ll use in this tutorial shows a good deal of distortion, so the location of vectors created from it should be confirmed by other reference sources.
In this tutorial we will be digitizing ancestral Haida villages on the Queen Charlotte Islands (also known as Haida Gwai) from an 1878 geological map that has already been georeferenced. The villages will be created as a point shapefile; however, similar results can be attained by creating a new point feature class within a file geodatabase (see Creating GIS Datasets from Historic Maps).
Steps
-
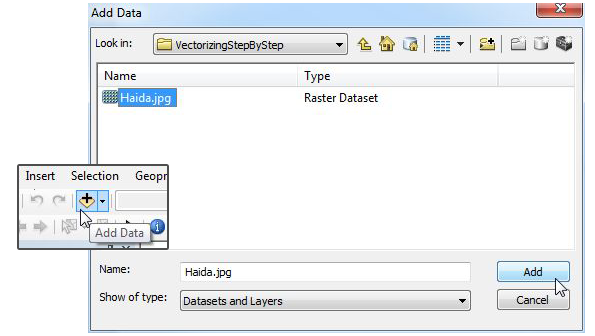
Selecting the georeferenced image to add to ArcMap 10 Add a georeferenced map or image to ArcMap. For this exercise add Haida.jpg. Download the georeferenced map in a .zip file from /i/2012/08/Haida.zip (15MB) and save to your computer.
The zip file format reduces file size and preserves folder structure but the contents must be extracted before use.
Extract the zip file contents to your computer using Windows Explorer, WinZip, or another program.
In ArcMap use the "Add Data" button to browse to the folder where you extracted the zip contents and highlight the file by single clicking Haida.jpg and then click Add.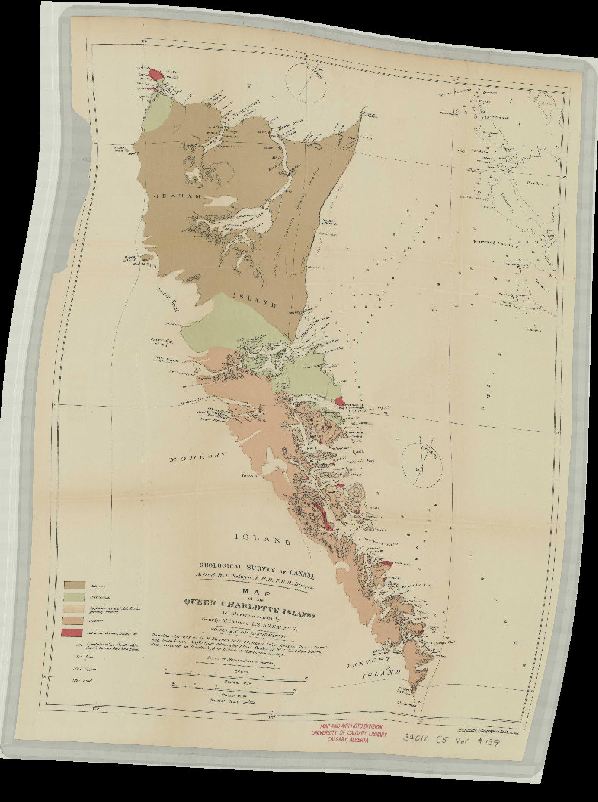
Map of Haida Villages -

Catalog Window Open the Catalog window.
-
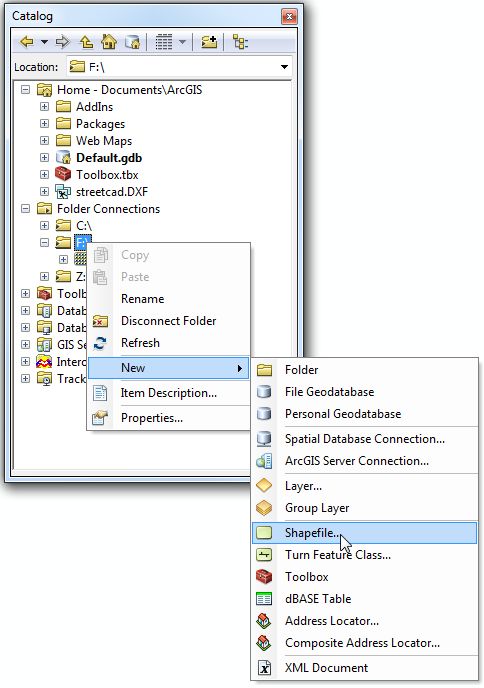
New Shape File Browse to your desired folder location and create a new point data set by right-clicking on that folder and selecting New > Shapefile. Give it a name and Edit the coordinate system. The easiest option is to simply import the coordinate system from the georeferenced map. Click Add and then OK twice.
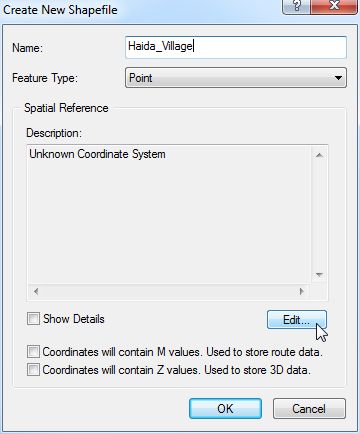
Create New Shape File Dialog 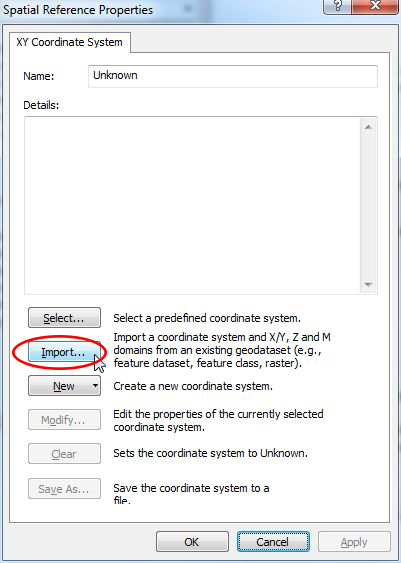
Spatial Reference Properties 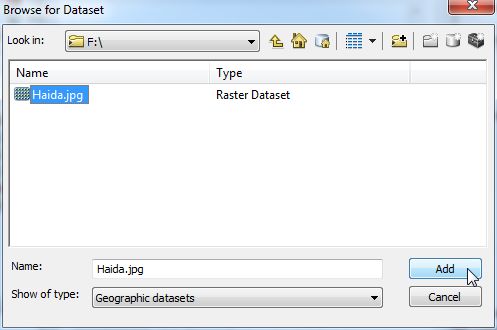
Browse for Dataset The new point shapefile will now appear in the Table of Contents, but nothing will appear on the map because the new data set has not yet had information added into it.
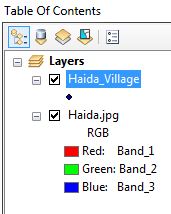
Updated Table of Contents -
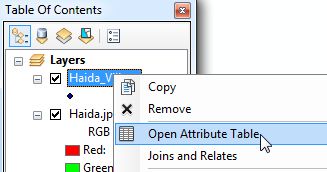
Table of Contents Open Attribute Table Open the attribute table for the newly created point shapefile and add a new Text field called Name. As you can see the table is empty. Leave the table open.
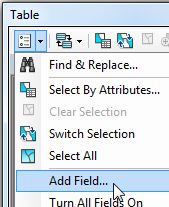
Table Add Field 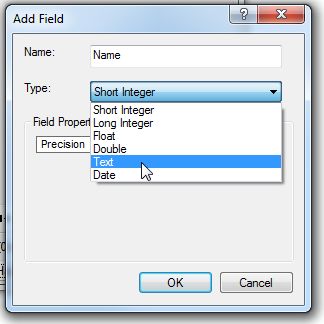
Table Add Field -
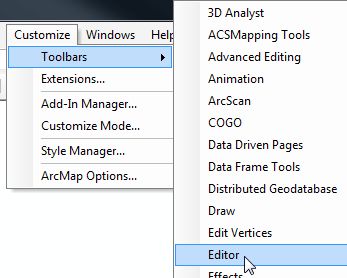
Editor Toolbar If not already present within your ArcMap window, turn on the Editor toolbar and then select Start Editing from the toolbar.

Start Editing -
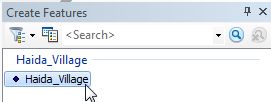
Create Features We can now start the process of adding the features that we want to digitize. Zoom into the first feature that you want to add to your new layer. In the Create Features box that has opened, select your empty shapefile and then at the bottom of the section underneath that, select Point.

Construction Tools With the arrow tool that appears you can now create your point features and add a name to the new feature in the open attribute table.
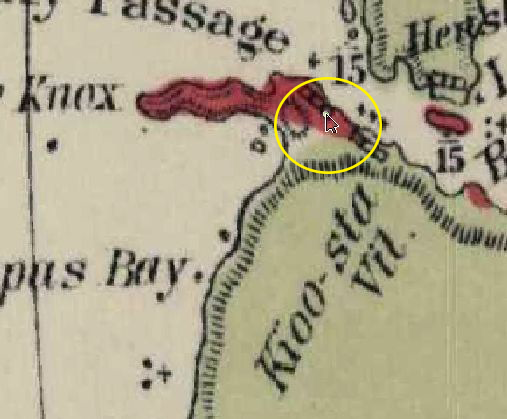
Create Feature Tool 
Type Feature Name -
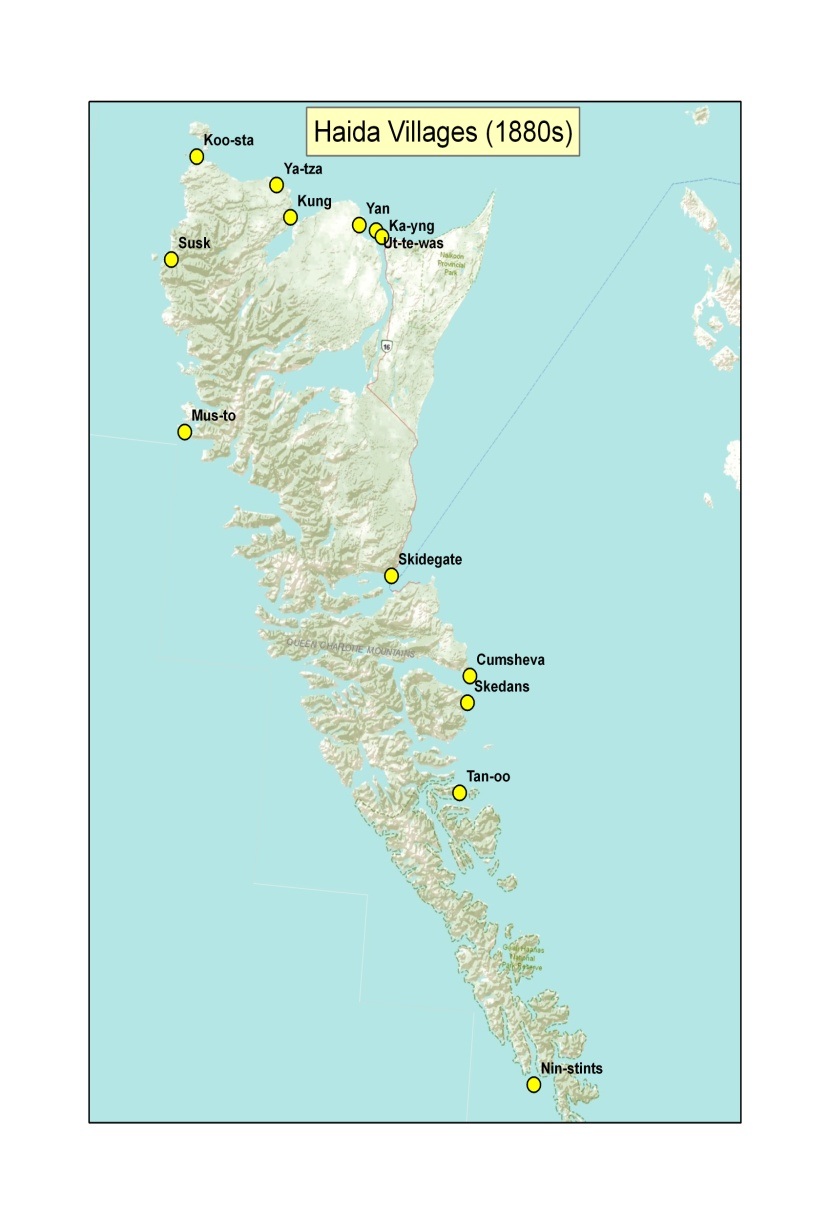
Haida Villages After adding all the features, stop editing and save your edits. You have now finished creating a point feature shapefile. This new layer can be added to any kind of GIS map (basemap, thematic map, digital elevation model, imagery) and the points can be labeled. All sorts of spatial queries and analyses can now be performed using these point features: buffers, distance measurements, shortest paths, etc.
Finished Product: Vectorized points on a topographic map
Learn more
- Historical Maps in GIS by David Rumsey and Meredith Williams
- “Creating a new shape file in ArcGIS," Community and Regional Planning Program, University of Texas at Austin
- ArcScan – this ArcGIS extension allows you to automate the vectorization process for lines and polygons.

